We all had been there, suddenly you need to get your feet wet on a REST API, you have a copy of PHPStorm for IDE and you want your testing to be a part of your project for later use.
If you had been paying attention to the title of this Article then you guessed it right: PHPStorm has a built in tool that has just enough features to complete the task at hand, say hello to…
HTTP Client
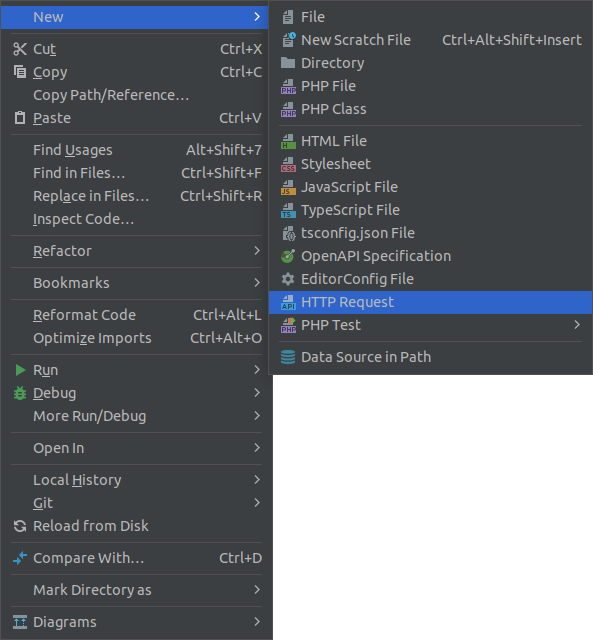
To use it all you need to do is to create a new HTTP file: File -> New-> HTTP Request, it can have the *.http or *.rest extension.
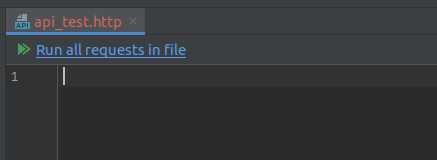
Give it a name.

Next thing you will notice is the following window.
Let's start with a basic authentication example, nowadays it is very common to find a basic curl call to exemplify the call, as for example:
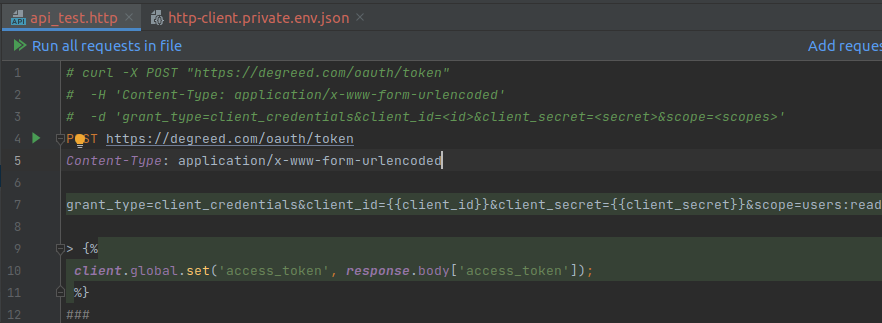
curl -X POST "https://degreed.com/oauth/token"
-H 'Content-Type: application/x-www-form-urlencoded'
-d 'grant_type=client_credentials&client_id=<id>&client_secret=<secret>&scope=<scopes>'
Let's make use of a handy feature that will save us a ton of time, for this make sure to copy to the clipboard the curl statement, move to the first line of the editor and paste the clipboard contents.
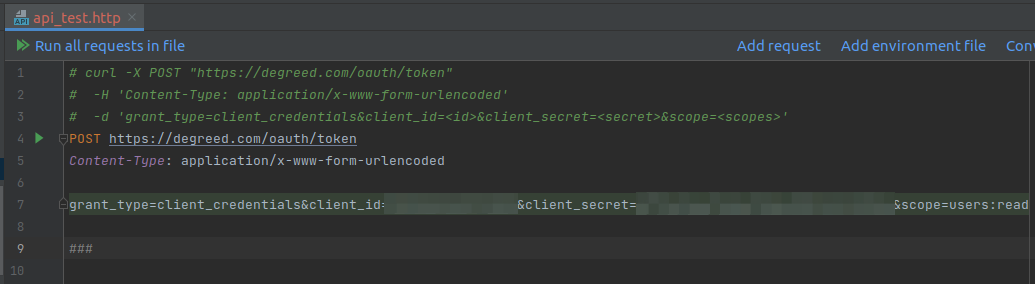
It has transformed the curl command into a formatted request, now all we have to do is to replace the values within <> with the correct ones and we should be ready to give it a try by Clicking at Run all requests in file
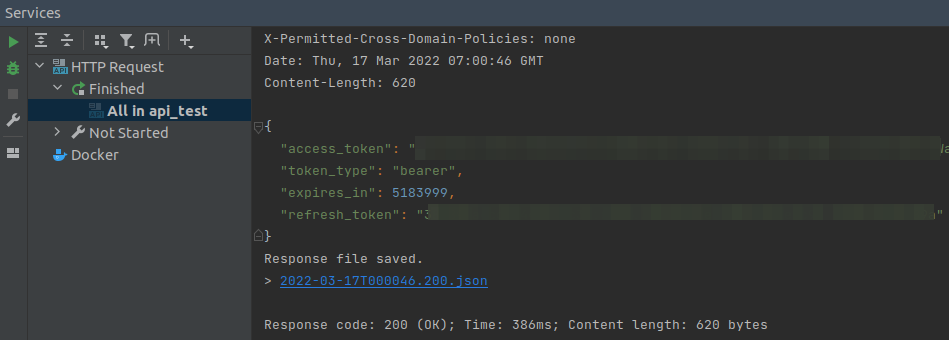
At top of the output window you will find information about the response, It also shows us the response returned in our case a JSON (key:values in green) and it tells us the location where this response can be found for further examination.
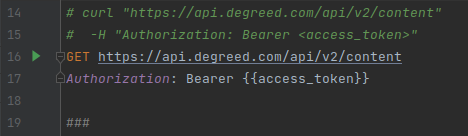
But what if we would need to use some information returned from that first call into subsequent calls? Let's take the following example which needs the access_token returned by the first call.
curl "https://api.degreed.com/api/v2/content"
-H "Authorization: Bearer <access_token>"
After copy + paste it into our request file we can see we need to replace <access_token> with the correct value.

This is where variables come in place!
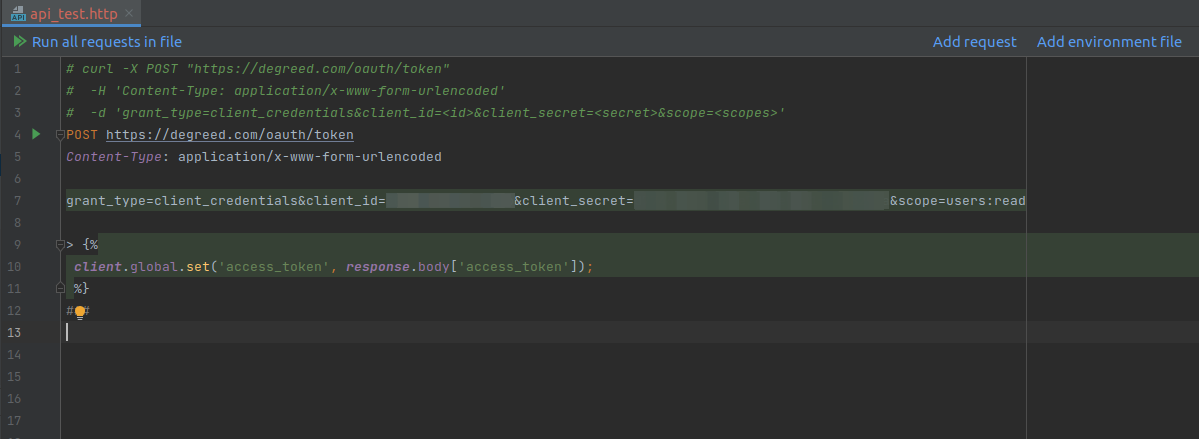
HTTP Client makes use of two main objects: client and response, we can set variables at the global scope of the client, for this example we are obtaining the value from the access_token field of our JSON response.
We can now use {{access_token}} variable wherever we need it, here is the rewriten GET call making use of the newly introduced variable.
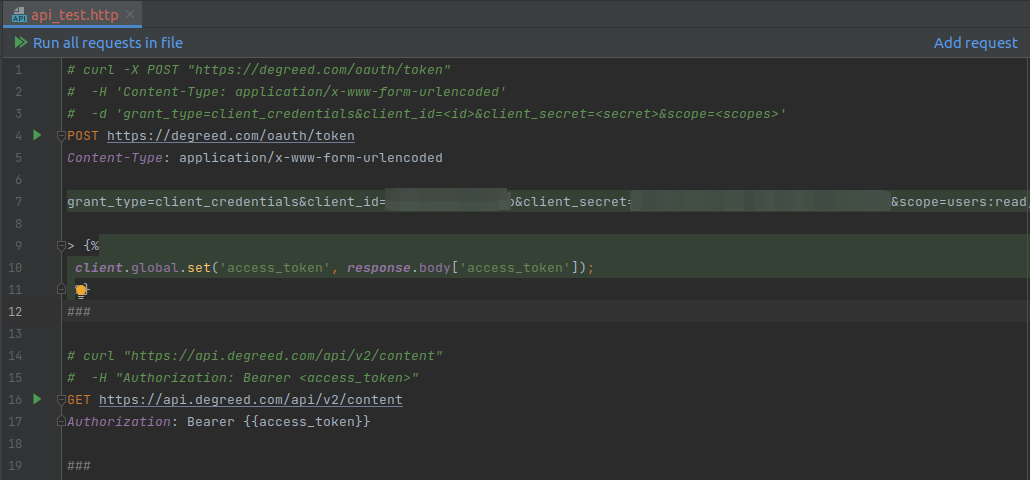
These are the now updated two calls
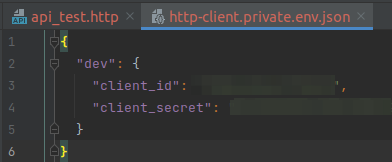
But what if we would need to retrieve the authentication info in an enviroment file for easy manipulation? you got it! just click on Add environment file.
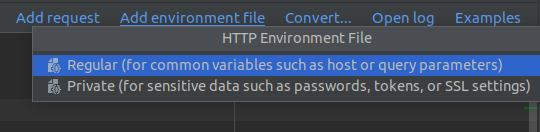
We will select Private

And fill out some values, we can one or more environments, each with different sets of values.
Now we can update the first call
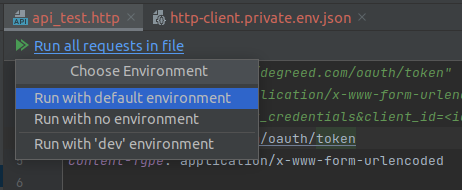
If we now Run all requests in file we will be presented with the option to select the environment from which we will retrieve the variables values previously defined.
I hope this Article has provided you with a glanze of how easy is to test a REST API with the HTTP Client.