
Why should you build a staff allocation tool in Airtable? For the last 2 years, we have relied on Resource Guru to manage the Tetris of resourcing allocation for our staff of 58 employees. What we liked about Guru is that unlike other SaaS platforms out there, the simplicity to be focused specifically on the allocation itself makes it perfect for what we needed. Many other tools provide things like project budget, management and tasks assignment which are things we already manage somewhere else.
The downside of Resource Guru is the pricing model in which you have to pay for every employee listed, even though they won’t be accessing the platform which is a drawback for us. Our latest invoice was for $170, a little too much considering that a single person manages the bookings and three others access the platform but in view mode only.
Now, our team is very familiar with Airtable since we are already using —moreless abusing— it as a backend for our website built in GatsbyJS on Netlify. And recently, someone from the team popped up the question: what if we handled the staff allocation or team workload with Airtable? And that’s how it started.
How to build a staff allocation tool using Airtable
Here’s a link to a template of the base table, go ahead and copy it into your account using the “copy base” button on the top right corner. You will need to have a paid Airtable account in order to use the blocks functionality such as Gantt and charts.
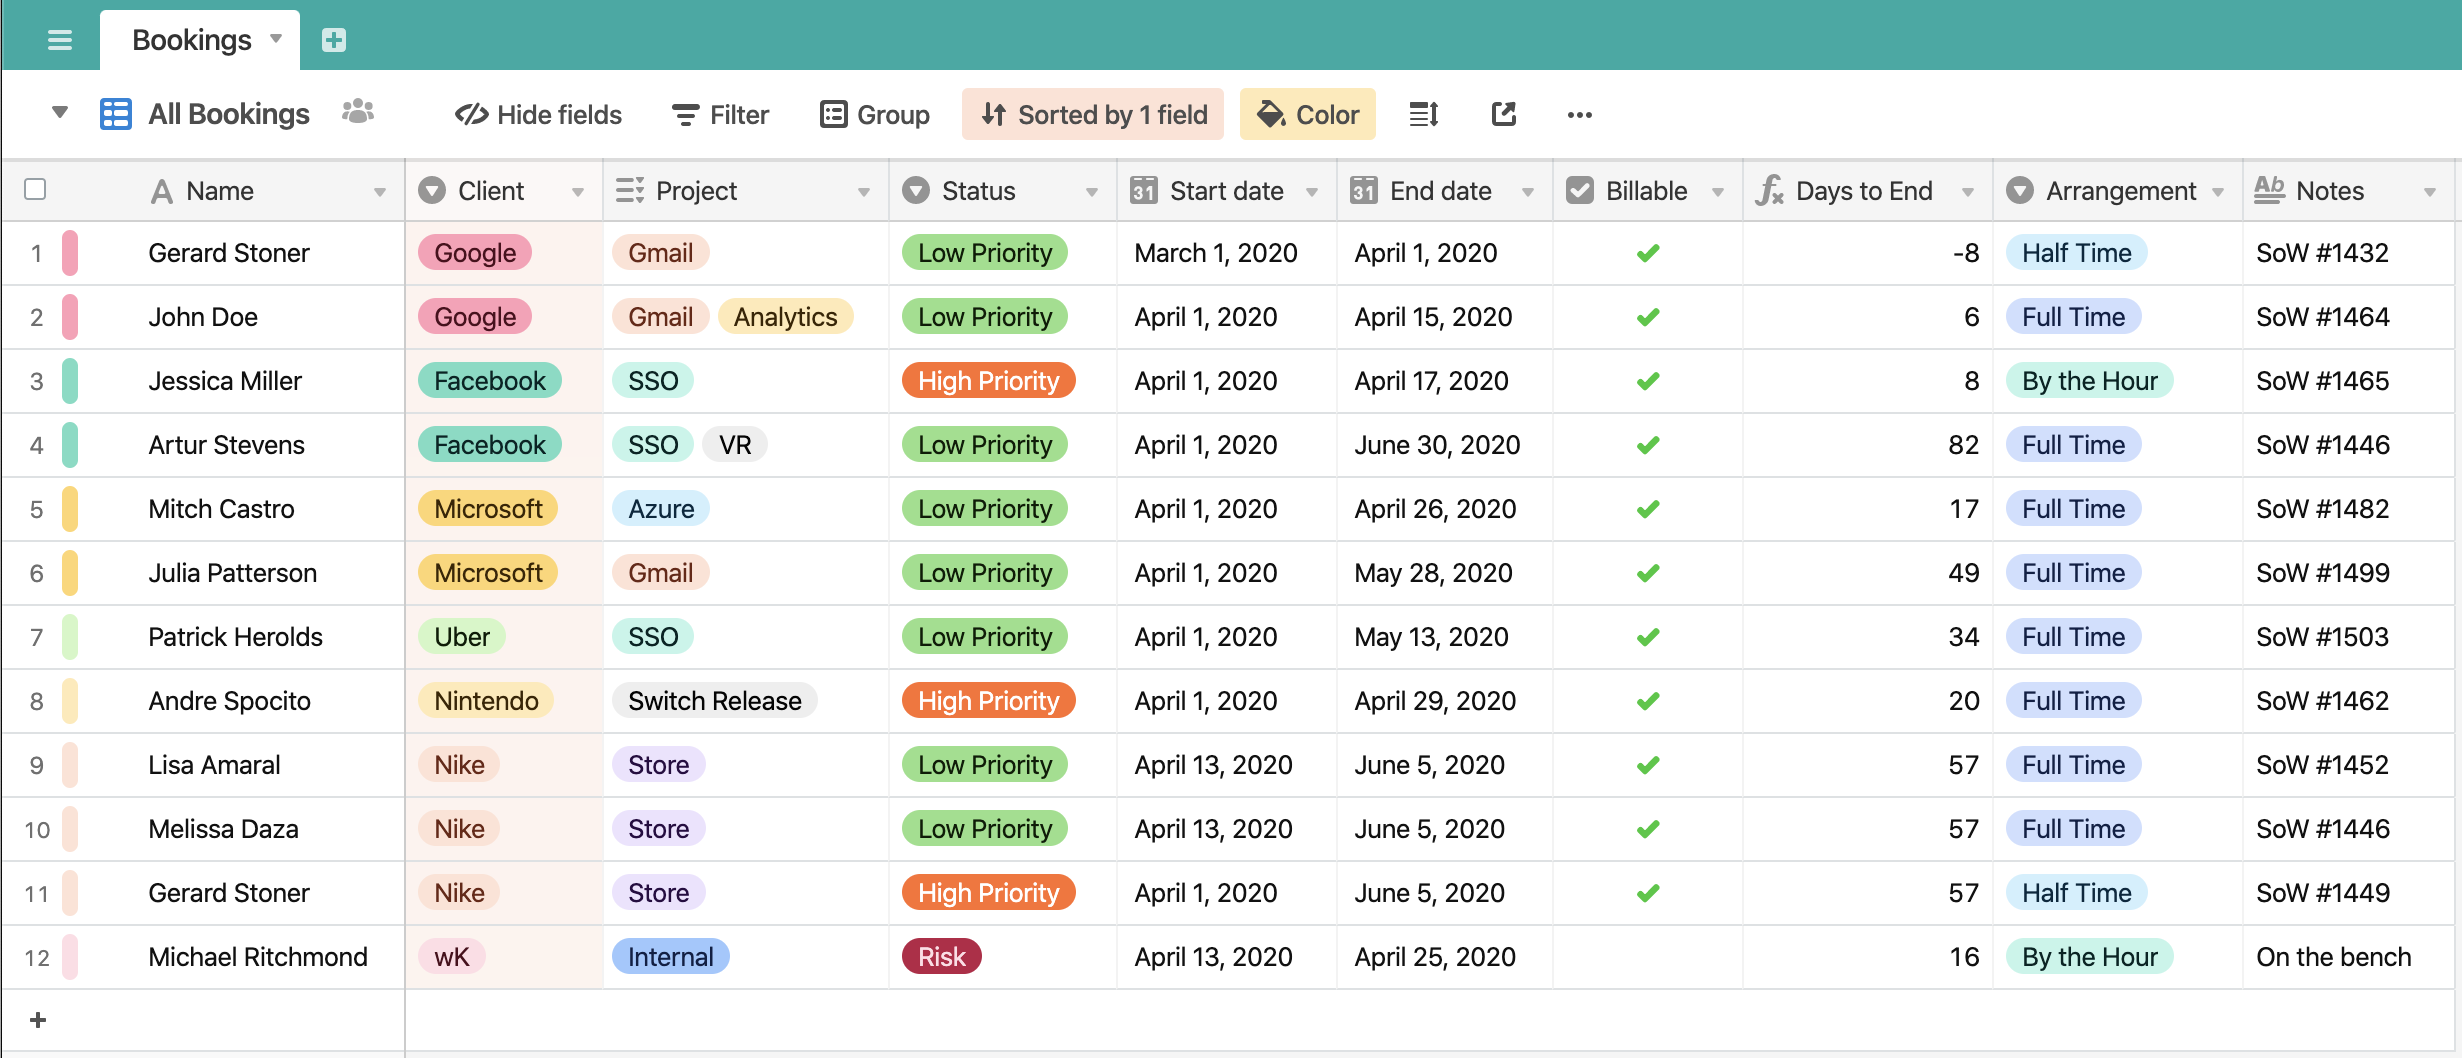
As you can see, the fields are pretty self explanatory and one important aspect is that we wanted to keep it as simple as possible, just like Resources Guru but you can go ahead and extend it further with things such as a Department or SoW attachment fields.
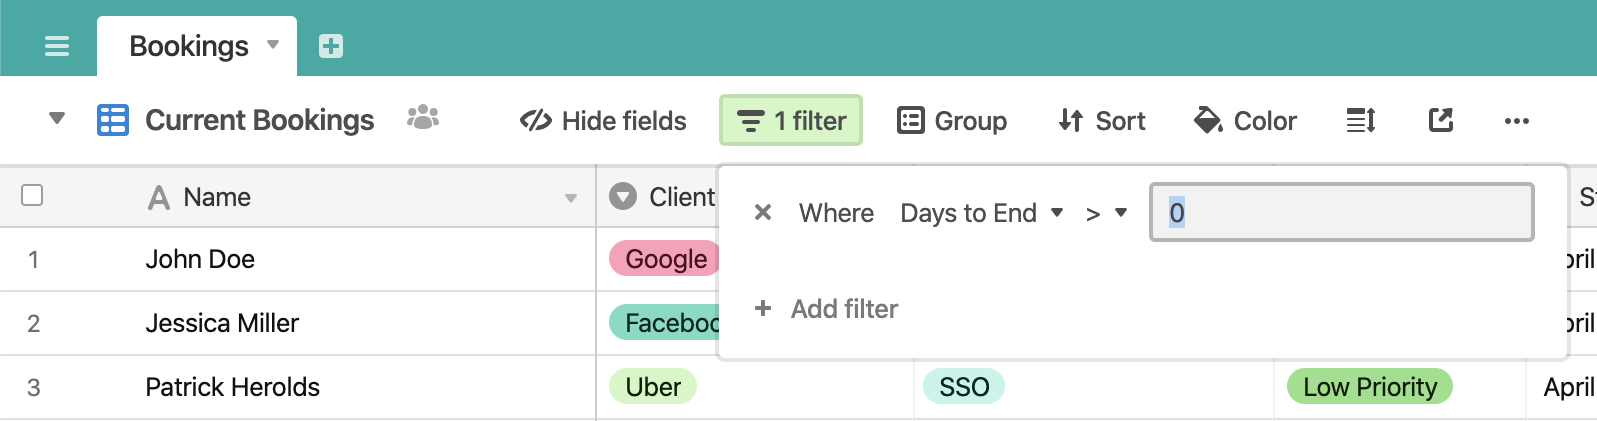
Notice there are two views you can access using the dropdown arrow as described below. There’s an All Bookings view containing all records with no filters added. The view called Current Bookings has a filter applied to display only the bookings currently active, using the field Days to end> 0.
Regarding the part where we automate the process of having Airtable send notifications to a channel in Slack when a booking is 8 days from ending, Airtable itself cannot perform this task so we did it through Integromat but it can also be done in Zapier.
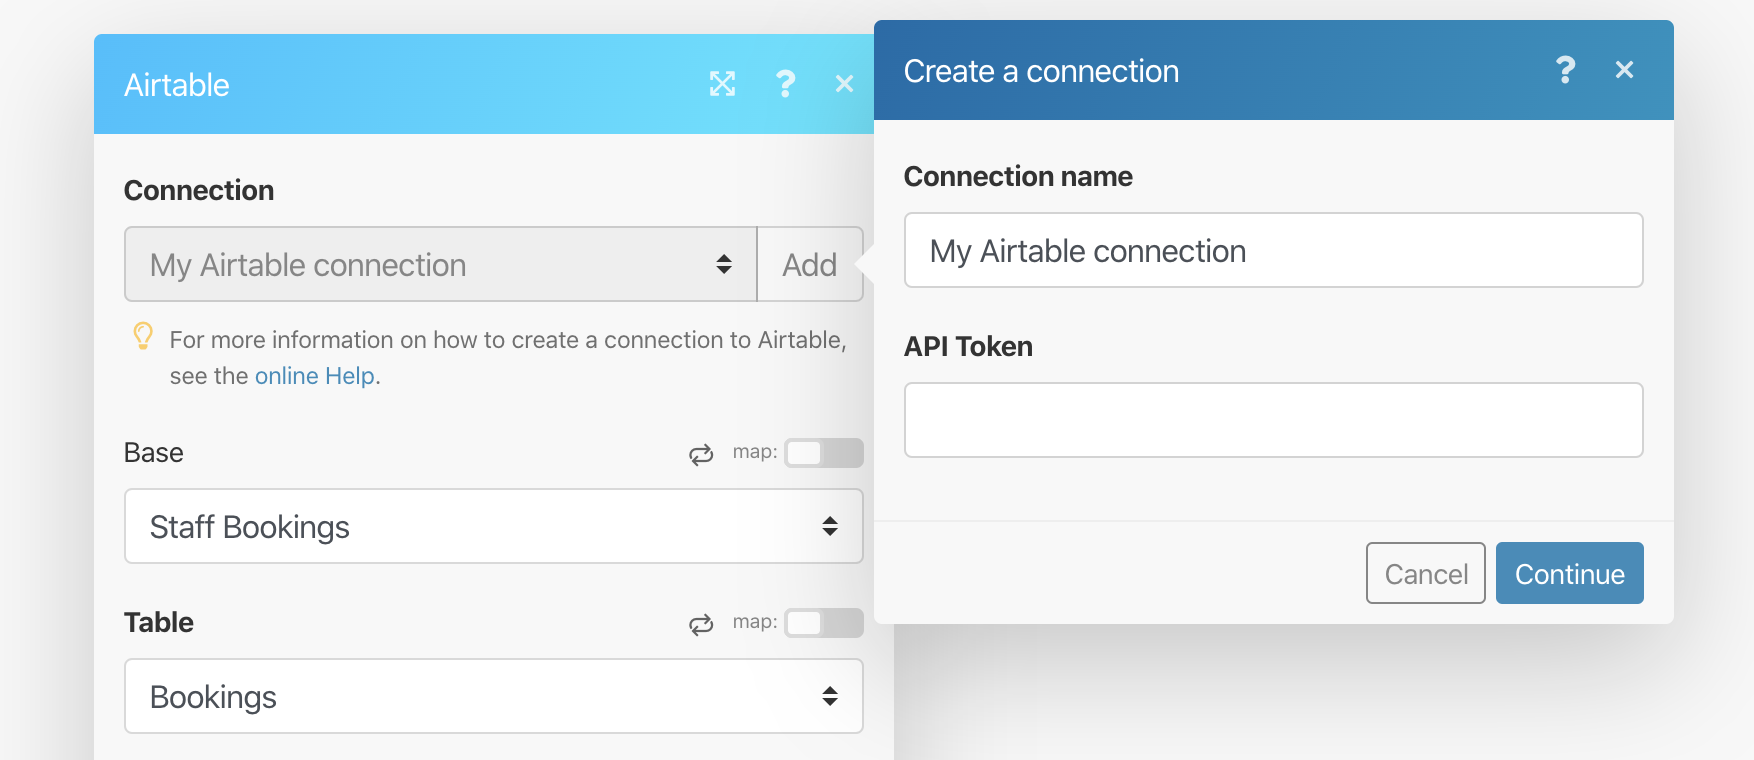
First, you need to create a free account in Integromat and then select Airtable and Slack from the list of applications.
On the next screen, click on the (?) and select Airtable. Then select Search Records from the list. On the next window click on “Add” in order to connect with Airtable and retrieve your base. You will need to get the API token from Airtable in order to connect.
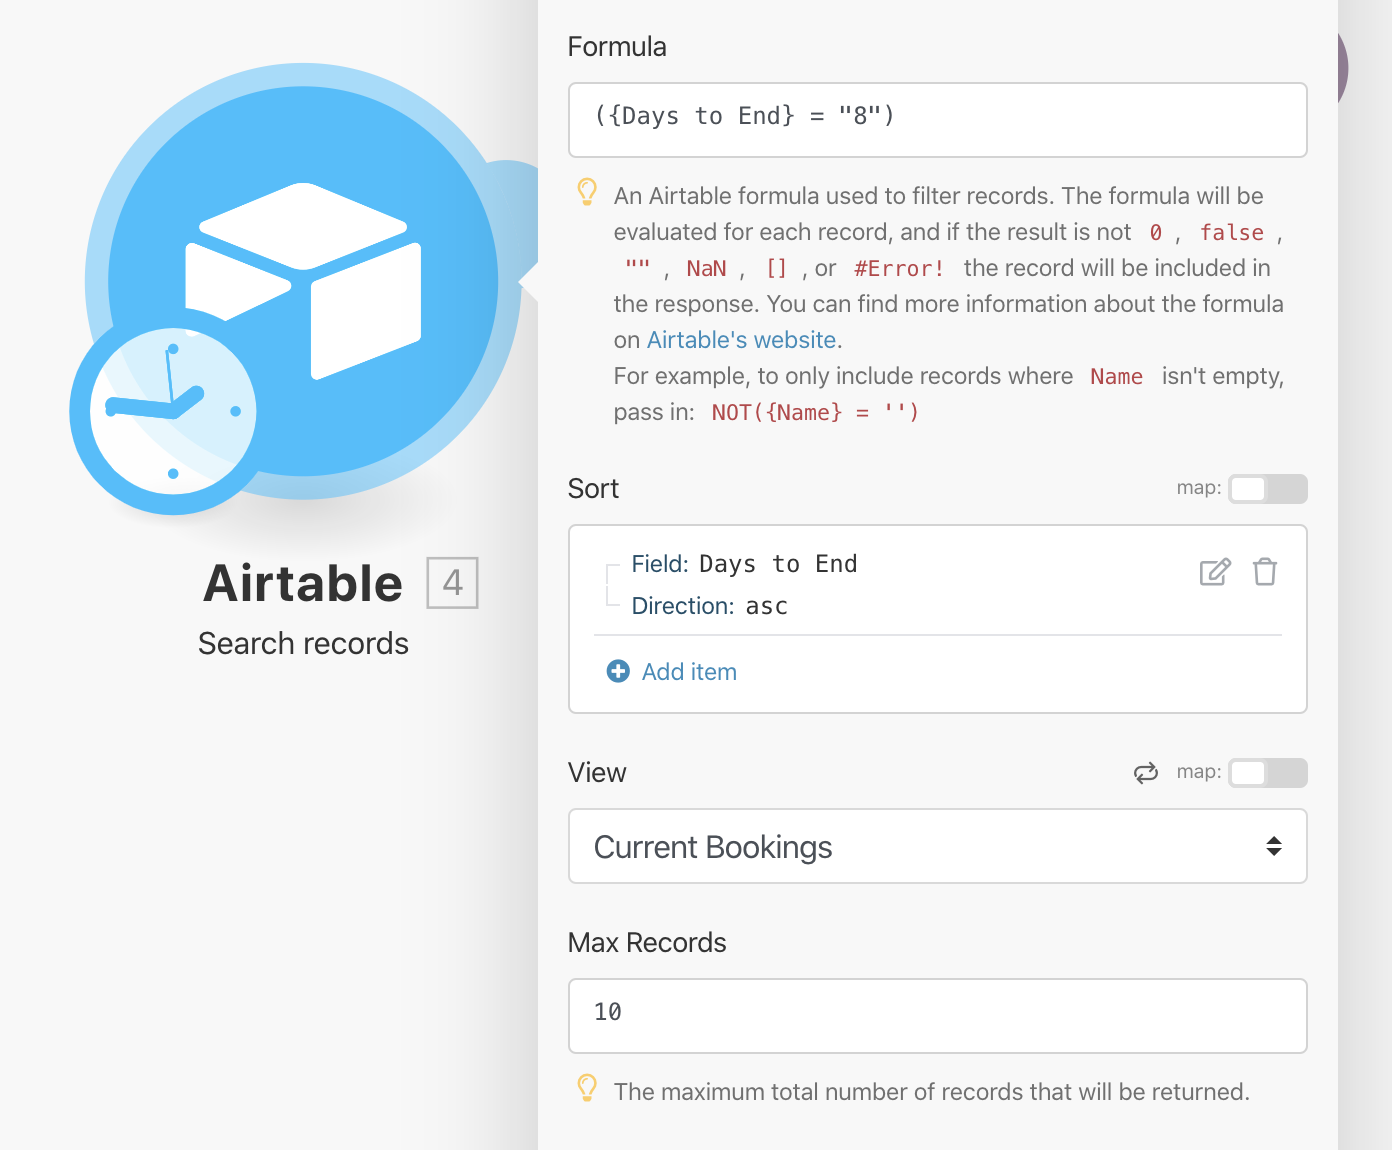
Then Integromat will take you through the rest of the selection process by selecting the base and the table. The Formula field contains ( {Days to End} = "8") where Days to End is the name of the field column in Airtable and 8 is the specific count when we would like to have the trigger. Make sure to select the right view in the following dropdown as shown in the image below and add a _Max records number.
Once you have them all filled out, go ahead and click OK. Now click the Run once button located in the lower left corner. If everything goes well, you should see no errors and Airtable records coming in. Congratulations!
Now that we have the records, we need to trigger the Slack message. Either double click or right click anywhere in the canvas to Add a new module, then select Slack. Next, click Add to connect the Integromat app to Slack.
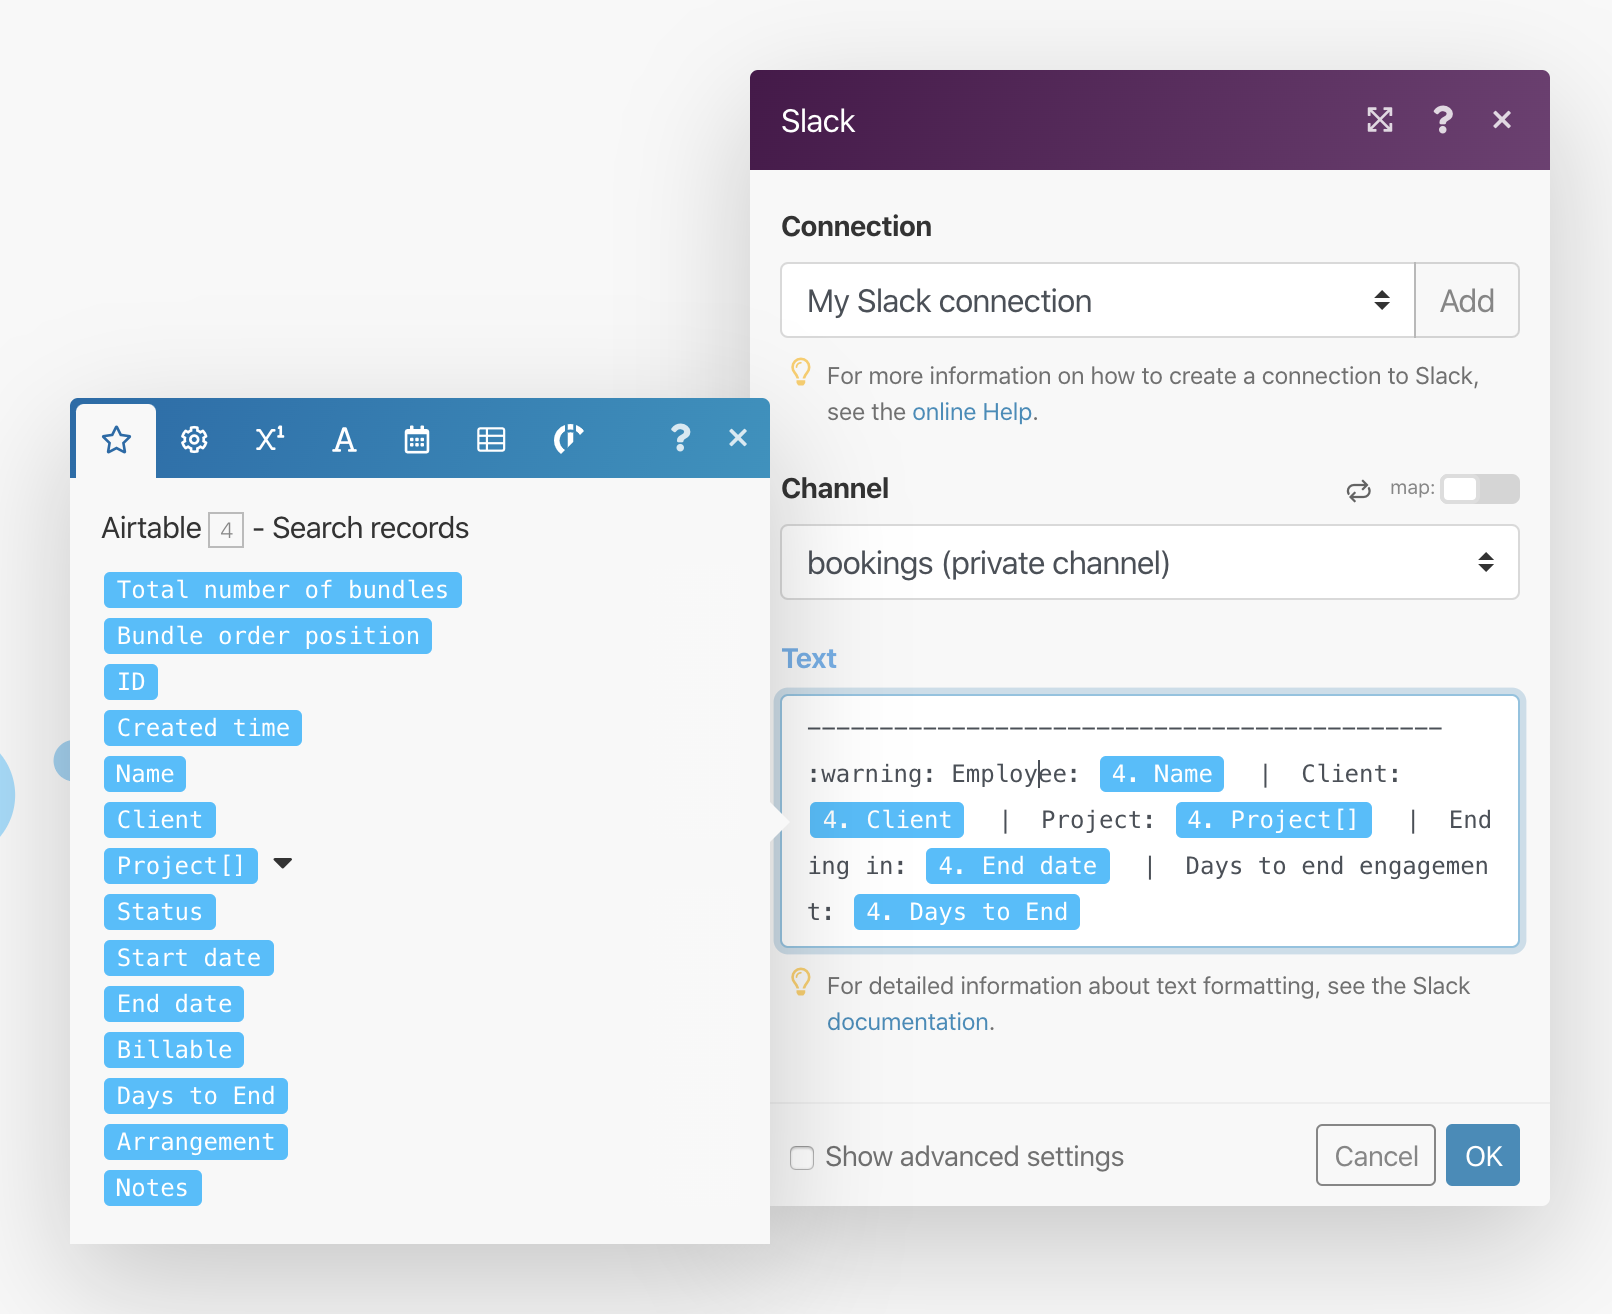
You will be presented with the list of channels so you can select where the notifications will be posted. Then, using the long text field, choose the records that will be included as part of the message. You can even add icons for display as part of the message! Click Ok to save and close the window.
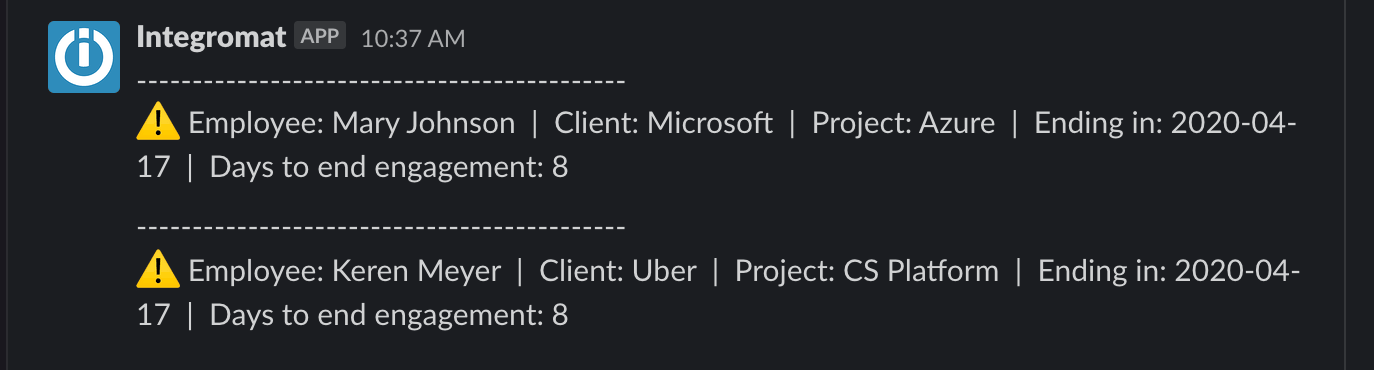
If you like, go ahead and once again click on Run once in order to make sure the whole process runs smoothly. If it goes well, you should get a Slack message posted in your channel.
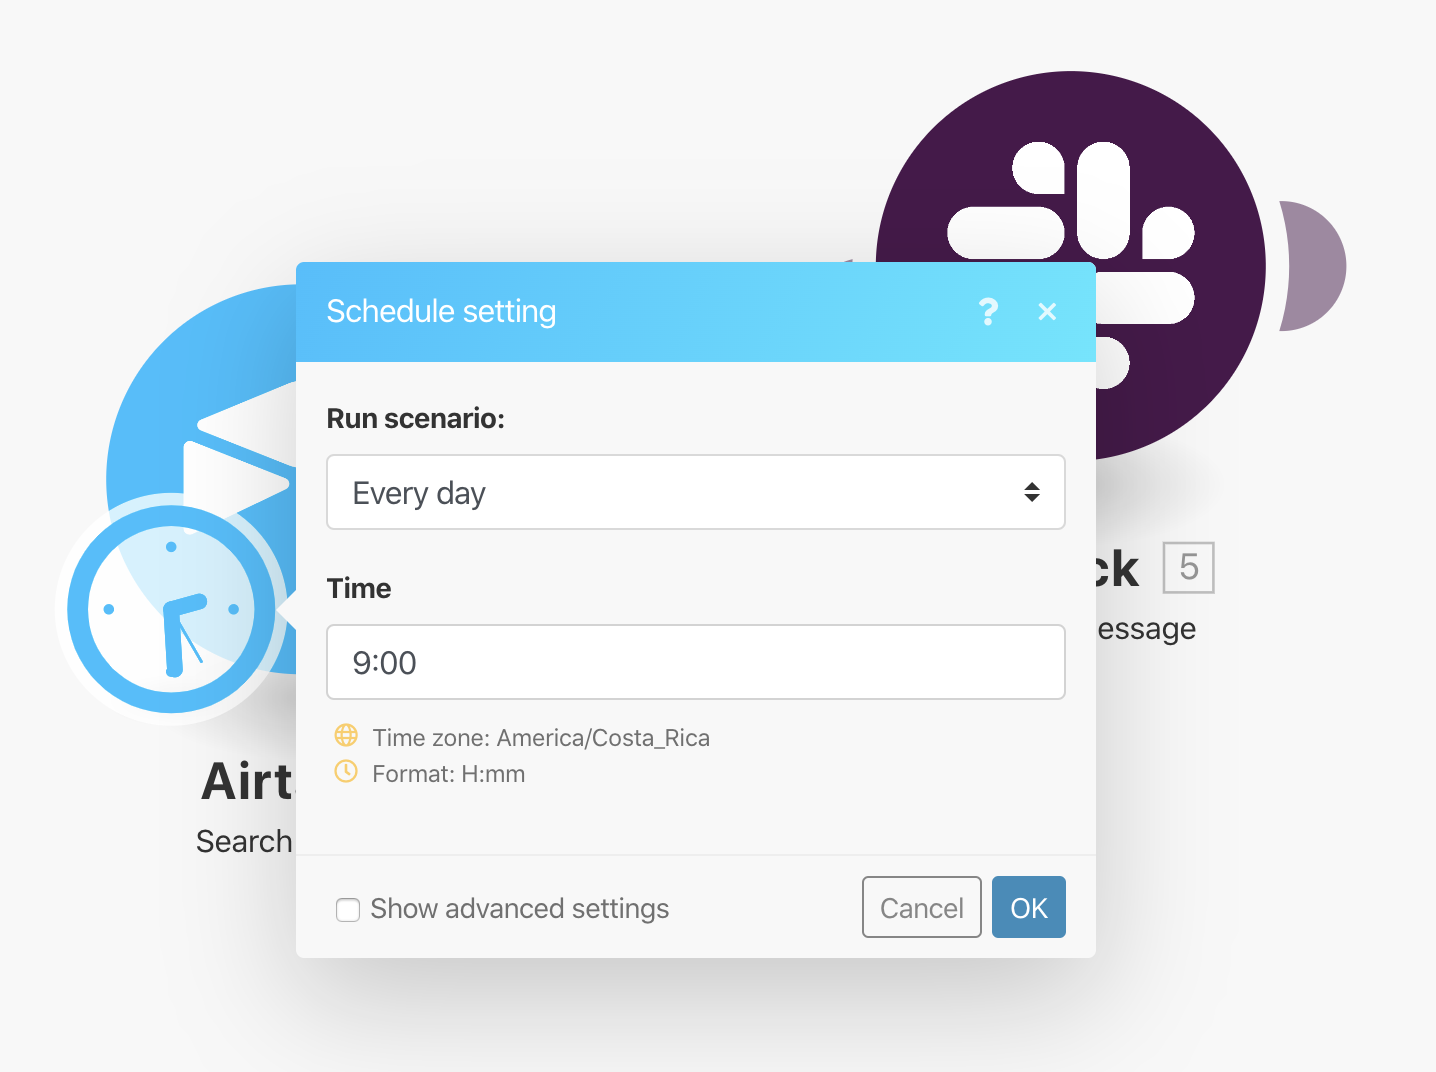
Now, let’s schedule the cron to run at a particular time by clicking the clock. In this case, we have it setup to run at 9:00am every day. Play around with the different options to fit your needs.
That’s it! Enjoy your new Staff Allocation platform and customize it further to fit your needs. And don’t hesitate to reach out if you have any questions or comments.