Today we will be looking at how to use context within React applications. The first thing to note is that context is an easier way to pass data through the component tree without having to manually pass information at each level.
In a typical React application, data is passed from the top down through props, but sometimes usage can be cumbersome for certain types of props (e.g., languages, UI theme) since they require many components within an application. Context would be a way to share values between components, as it is designed to share data that can be considered global to a component tree, such as the current authenticated user, theme or preferred language.
Context is mainly used when some data must be accessible to many components at different nesting levels. It should be applied sparingly because it hinders component reuse.
Having all this clear, we will begin to integrate the context in the app since we are going to translate the user interface from English to Spanish, the first thing is to create in the root folder the lang directory inside src and create the language.js file with the following code:
const Language = {
  en: {
    menuProducts: 'Products',
    menuCategories: 'Categories',
        . . .
    },
  es: {
    menuProducts: 'Productos',
    menuCategories: 'Categorías',
        . . .
    }
};

export default Language;
Then, the contexts directory is added inside src and then, the langContext.js file with the following code:
import React from "react";
import Language from "../lang/language";

const LangContext = React.createContext({
  setLanguage: lang => { },
  languages: Language.en,
});

export default LangContext;
Now, the file will be modified _app.js and the following code must be added:
import React from 'react';
import '../../styles/globals.css';
import 'bootstrap/dist/css/bootstrap.css';
import AdminLayout from '../layouts/AdminLayout';
import LangContext from '../contexts/langContext';
import Language from '../lang/language';

class MyApp extends React.Component {

  constructor(props) {
    super(props);
    this.state = {
      setLanguage: this.setLanguage,
      languages: Language.en,
    };
  }

  setLanguage = lang => {
    this.setState({
      languages: Language[lang]
    });
  };

  render() {
    const { Component, pageProps } = this.props;
    return (
      <LangContext.Provider value={this.state}>
        <AdminLayout>
          <Component {...pageProps} />
        </AdminLayout>
      </LangContext.Provider>
    );
  }

}

export default MyApp;
Now, in each component and page of your application, you can access the language and update the interface according to the preferred language. To be able to switch between languages, you must add to the AdminLayout.js layout a field that allows you to switch between languages:
import React from 'react';
import Sidebar from '../components/sidebar';
import LangContext from '../contexts/langContext';

class AdminLayout extends React.Component {

  render() {
    return (
            . . .
    < LangContext.Consumer >
      {({ setLanguage }) => (
        <div className='col'>
          <select className="form-select" onChange={e => setLanguage(e.target.value)}>
            <option value="en">English</option>
            <option value="es">Spanish</option>
          </select>
        </div>
      )
    }
    </LangContext.Consumer>
            . . .
    );
  }
}

export default AdminLayout;
Ready, now in each component that you need, you must add the following piece of code and you will be able to update the interface according to the language selected by the user:
return (
  <LangContext.Consumer>
    {({ languages }) => (
          . . .
      )}
  </LangContext.Consumer>
)
For example, the above code was added here in one of the components already created:
import React from 'react';
import LangContext from '../contexts/langContext';

/**
 * This is a product form component.
 */
class ProductForm extends React.Component {
        . . .

  render = () => {
    return (
      <LangContext.Consumer>
        {({ languages }) => (
          <div className='card mb-2 mt-2'>
            <div className='card-body'>
              <h5 className="card-title">{languages.addProduct}</h5>
              <hr className='divider' />
              <form method='post' name='form-product'>
                <div className='row mb-2'>
                  <div className="col">
                    <input type="text"
                      className="form-control"
                      id="product_name"
                      name="product_name"
                      placeholder={languages.phProductName}
                      value={this.state.product_name}
                      required={true}
                      onChange={e => this.onChangedData(e, 'product_name')} />
                  </div>
                  <div className="col">
                    <input type="number"
                      className="form-control"
                      id="product_quantity"
                      name="product_quantity"
                      placeholder={languages.phQuantity}
                      value={this.state.quantity}
                      required={true}
                      onChange={e => this.onChangedData(e, 'quantity')} />
                  </div>
                  <div className="col">
                    <input type="number"
                      className="form-control"
                      id="product_price"
                      name="product_price"
                      placeholder={languages.phPrice}
                      value={this.state.price}
                      required={true}
                      onChange={e => this.onChangedData(e, 'price')} />
                  </div>
                  <div className="col">
                    <select placeholder='Select a category'
                      className="form-select"
                      id="category"
                      name="category"
                      value={this.state.category}
                      required={true}
                      onChange={e => this.onChangedData(e, 'category')}>
                      <option value={'-1'}>{languages.phSelect}</option>
                      {
                        this.state.categories.map((c, i) => <option key={i} value={c._id}>{c.category_name}</option>)
                      }
                    </select>
                  </div>
                  <div className='col'>
                    <div className="d-grid gap-2 d-md-flex">
                      {this.showButtons()}
                    </div>
                  </div>
                </div>
              </form>
            </div>
          </div>
        )}
      </LangContext.Consumer>
    );
  }
}

ProductForm.contextType = LangContext;

export default ProductForm;

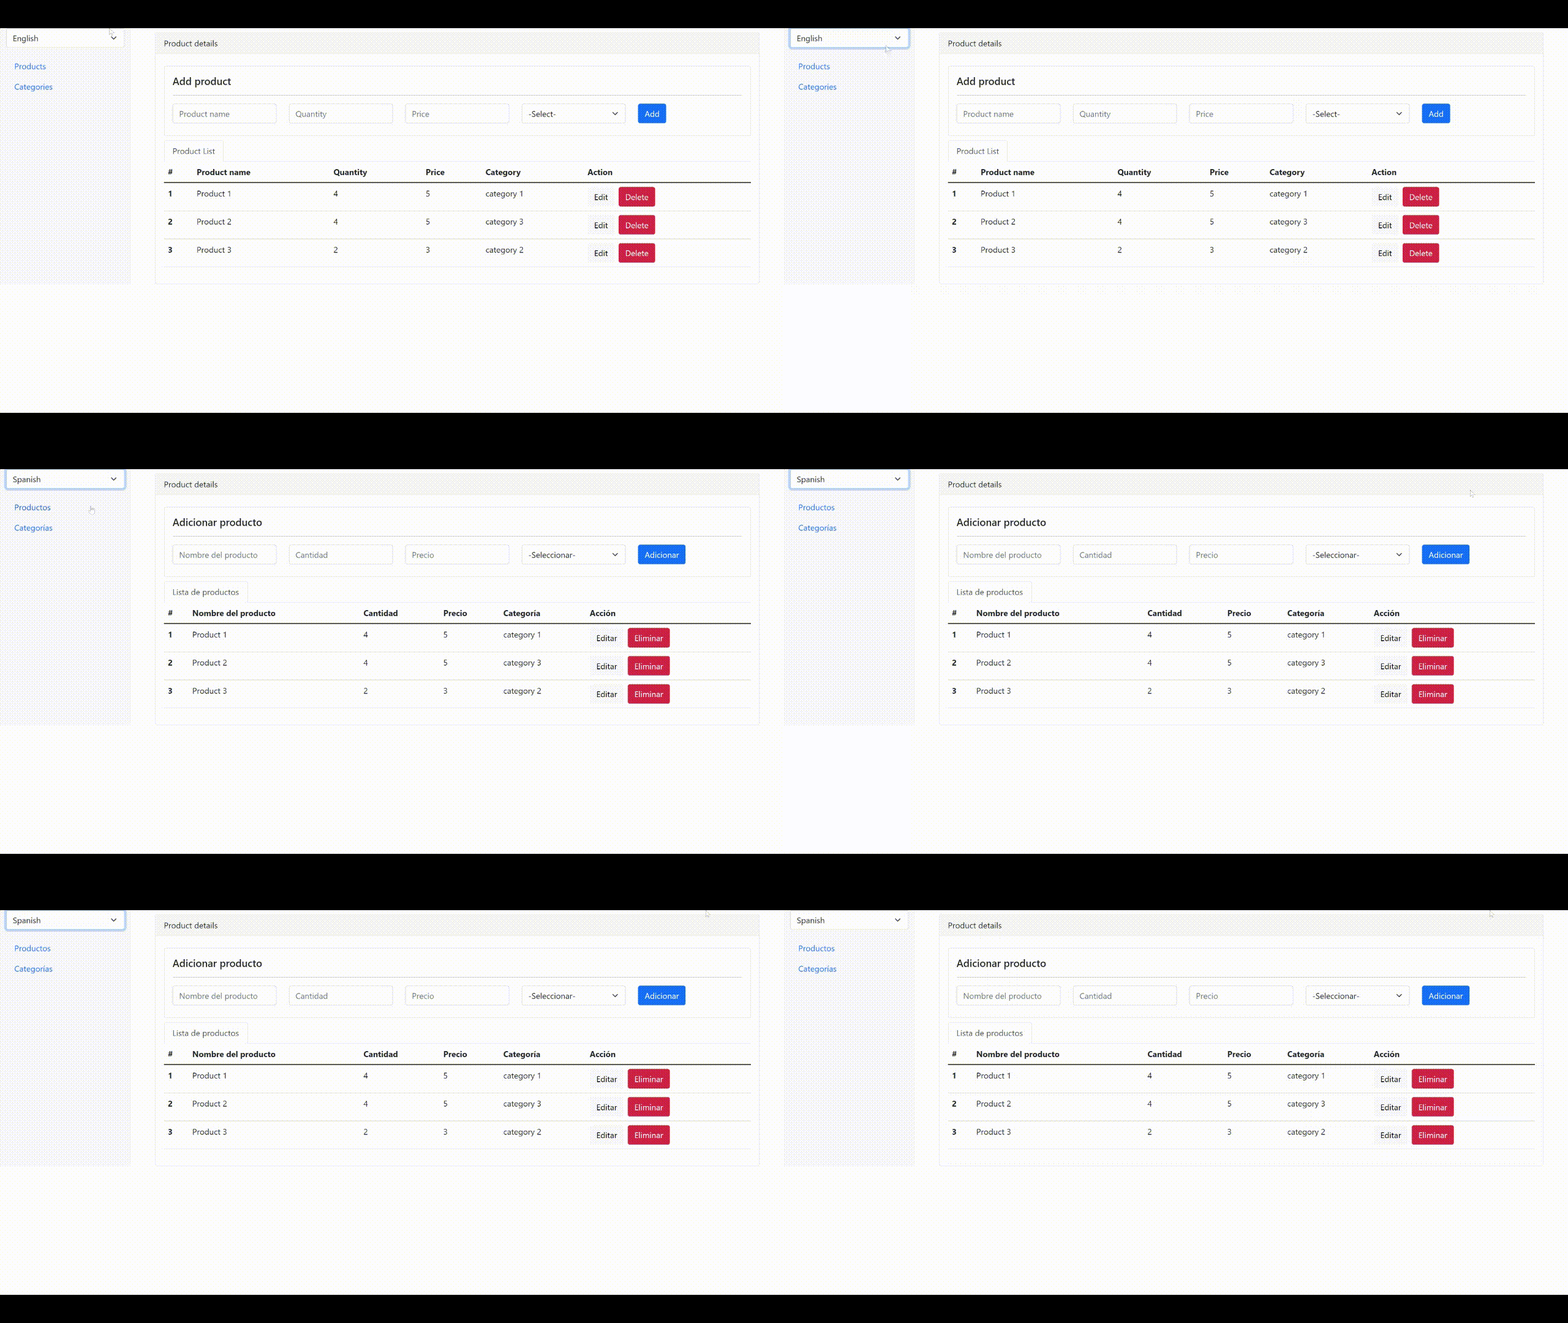
The app should now work with the translation, here is a screenshot of what it should look like:
